Swift 228 Recording Lab
The Swift 228 recording room contains one single-person double walled booth for experiments that require high quality audio recordings. Participants can respond to both video and/or audio stimulus using a keyboard, mouse or USB button box in the booth. Audio is recorded direct-to-disk through an external high quality analog to digital audio interface.
Equipment List
- Two MOTU Ultralight Audio Interfaces
- Two iMacs running OSX 10.8, 3.3GHz Intel Core i3 with 4GB memory
- APC Power backup
- Pair of Yamaha Monitor Speakers
- Shure SM81 Condenser Handheld Microphone
- Behringer Microphone Amplifier
- Presonus headphone amp
- Wireless Keyboard/Mouse/Trackpad
- 17-inch flat screen monitor
Initial Setup
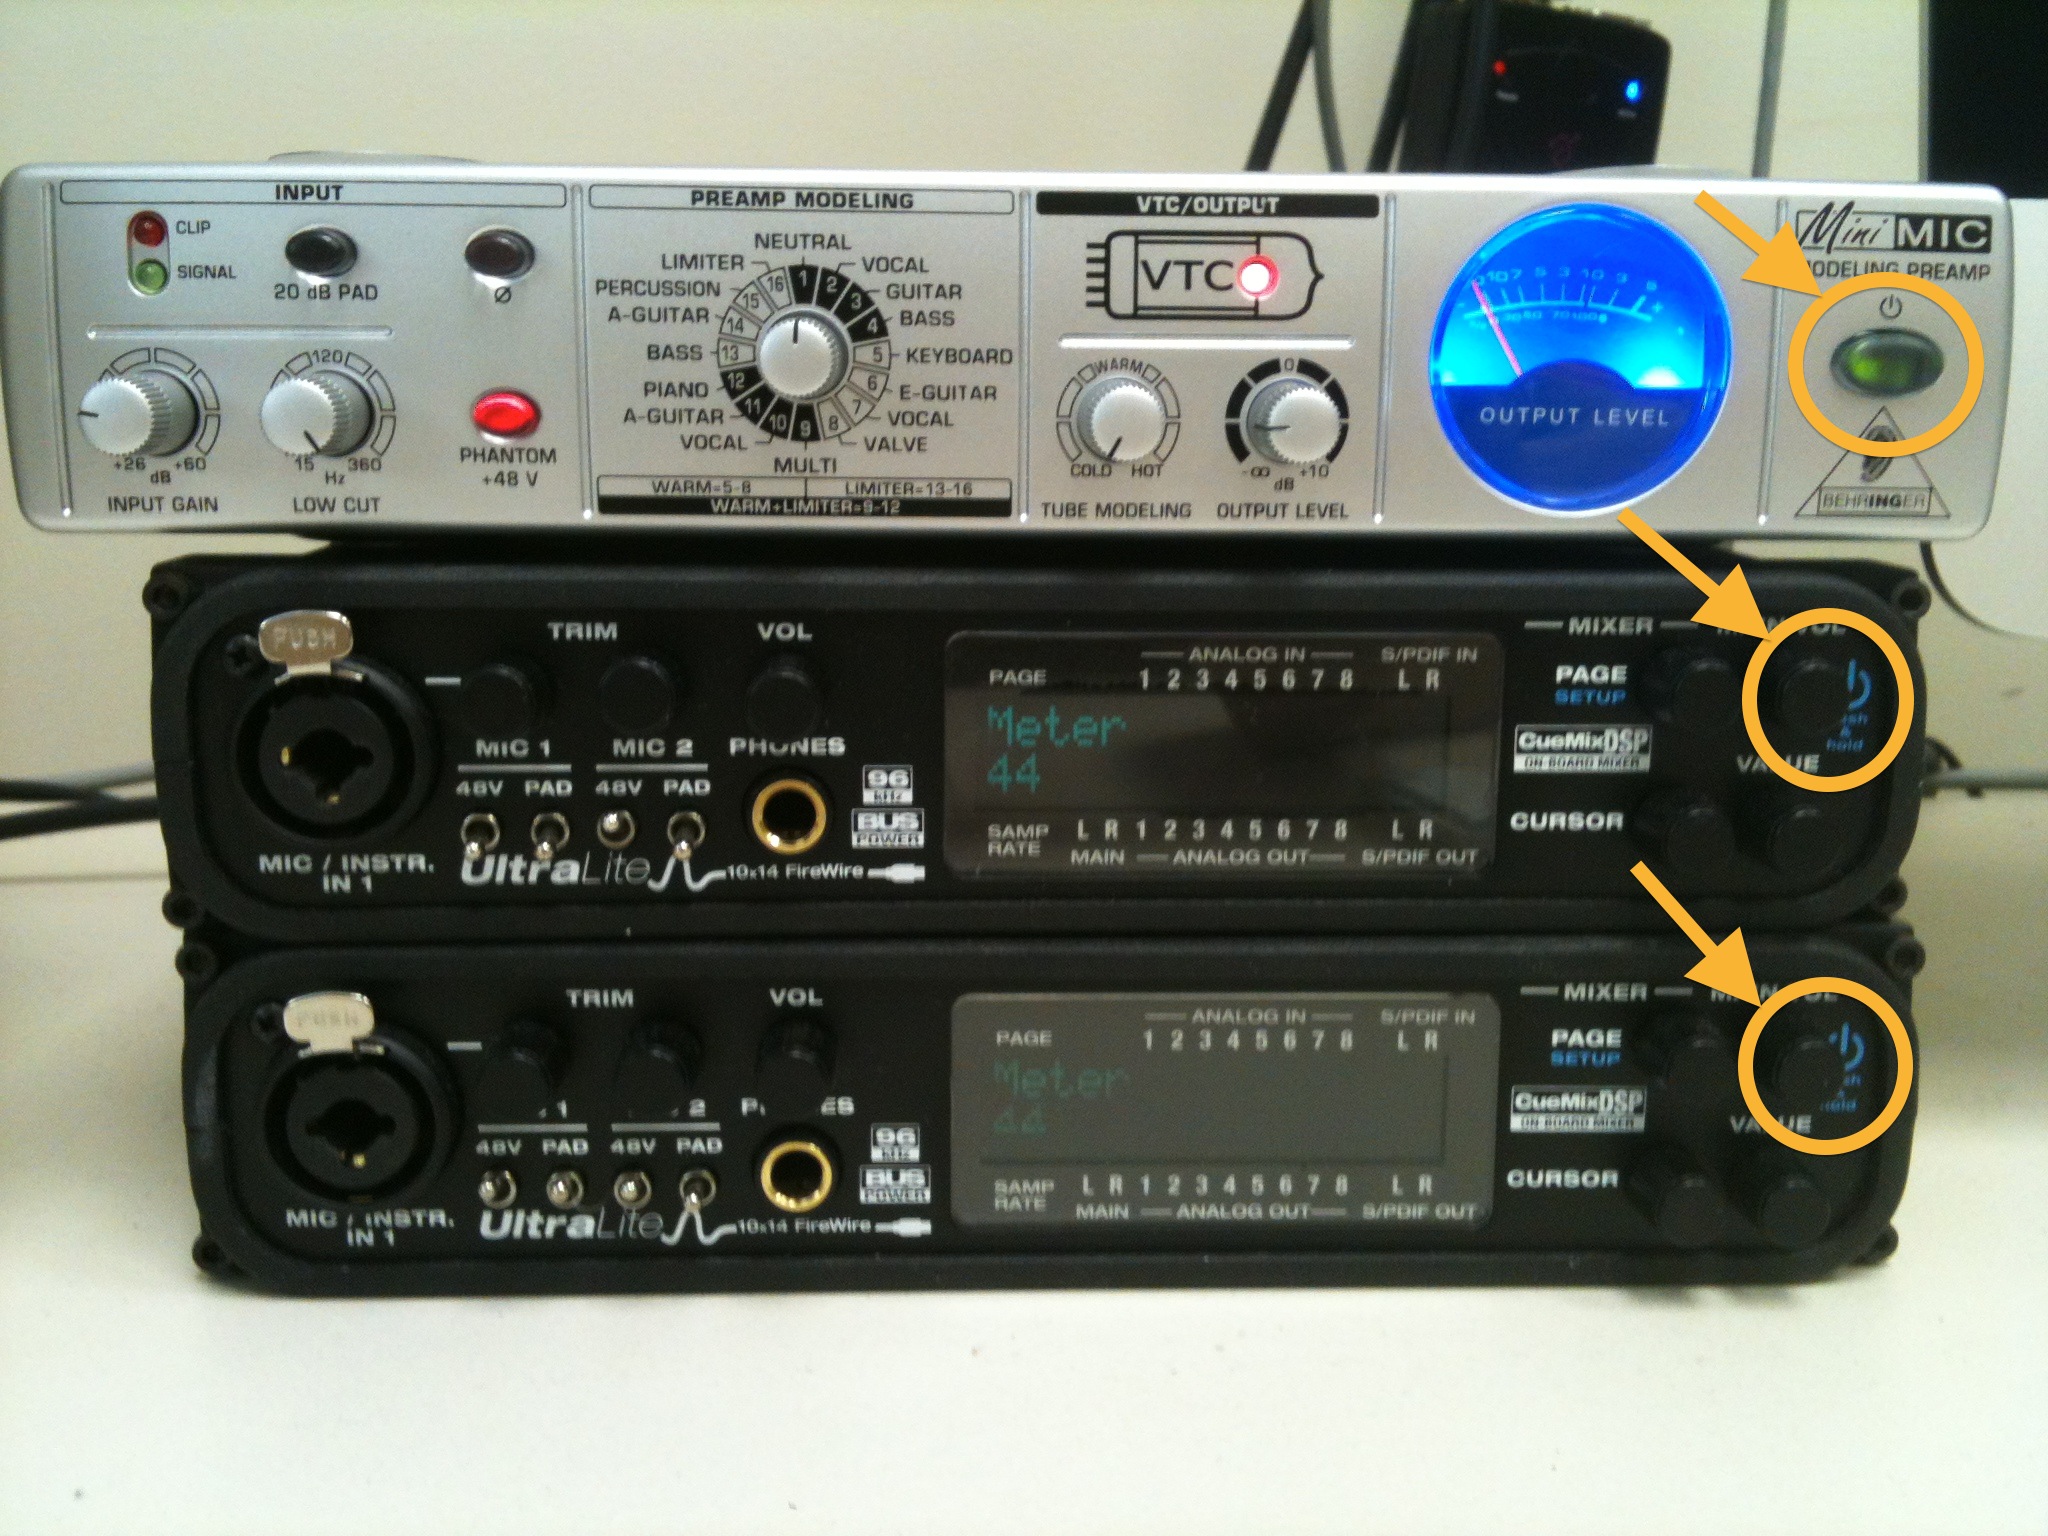
- Make sure that both MOTU ultralight audio interfaces are on. If they are off, hold down the volume button to power up.
- Turn on the Behringer Micorphone Amp
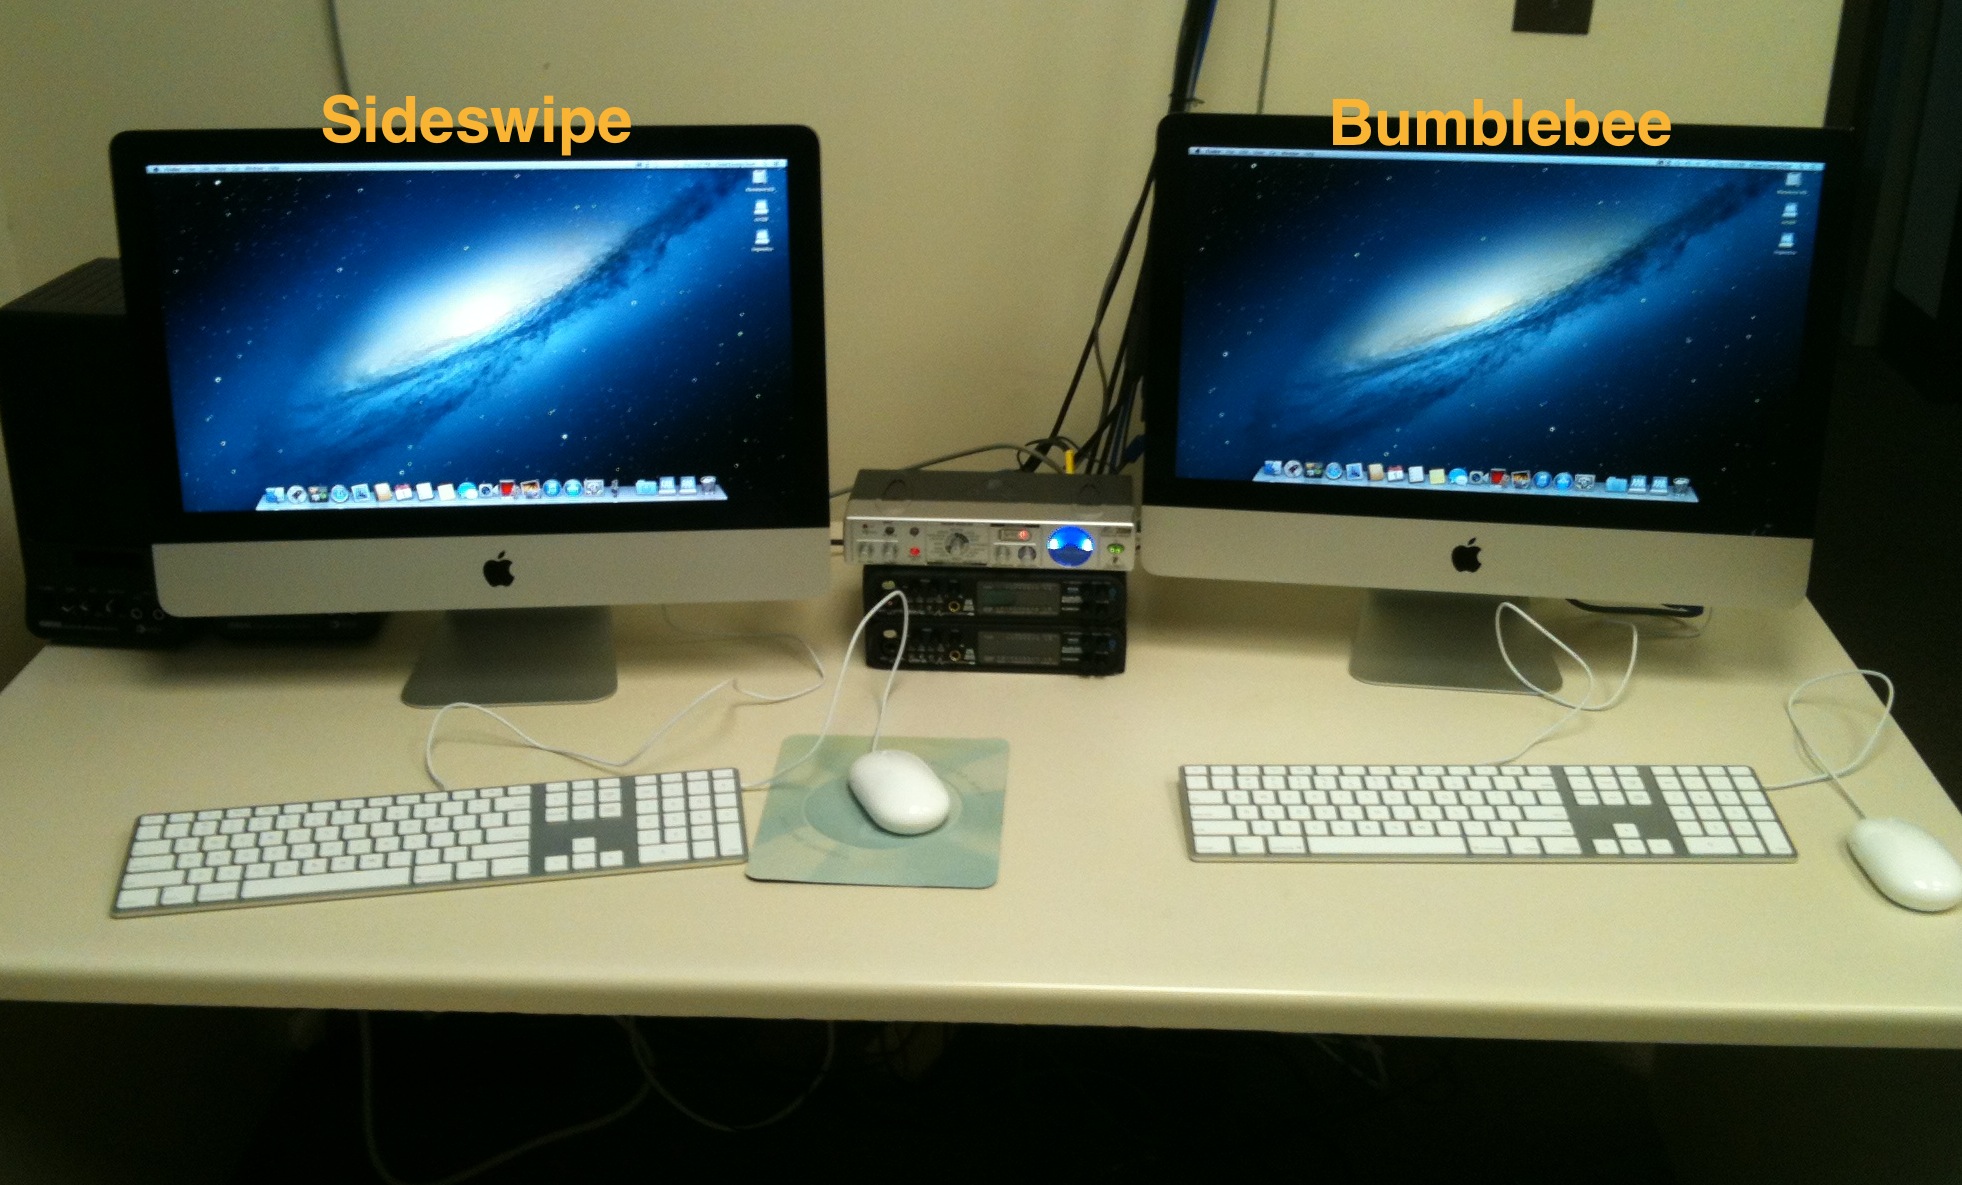
- Wake up or turn on both iMacs (Sideswipe and Bumblebee). Log in with your netID and password.
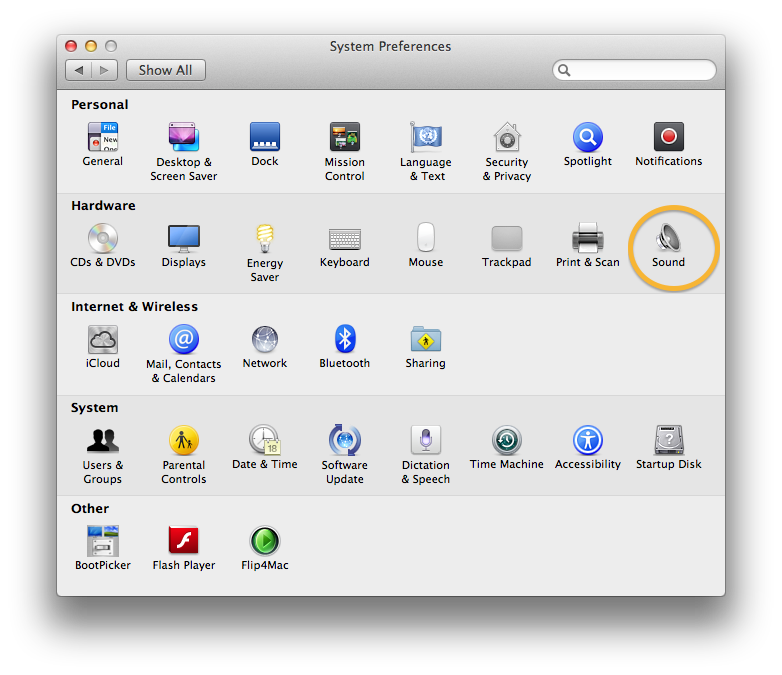
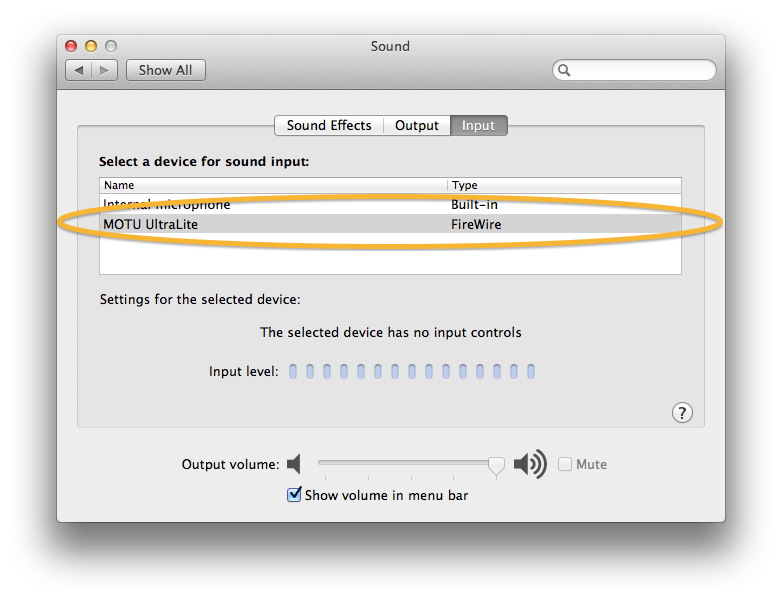
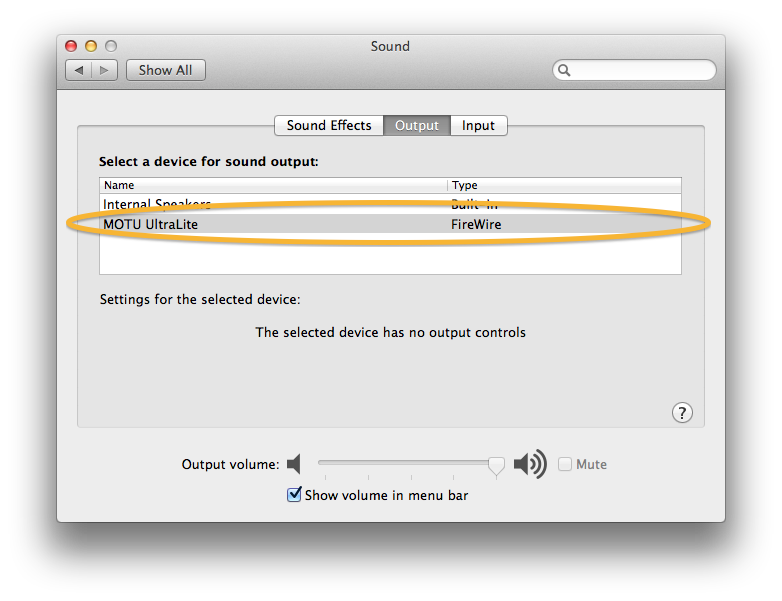
- On both iMacs, click "System Preferences" and then set the input and output Sound Device to "MOTU Ultralight"
- Close the System Preferences window
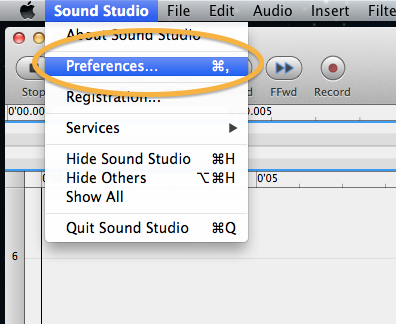
- On Sideswipe, Launch Sound Studio, then select "Preferences..." from the menubar
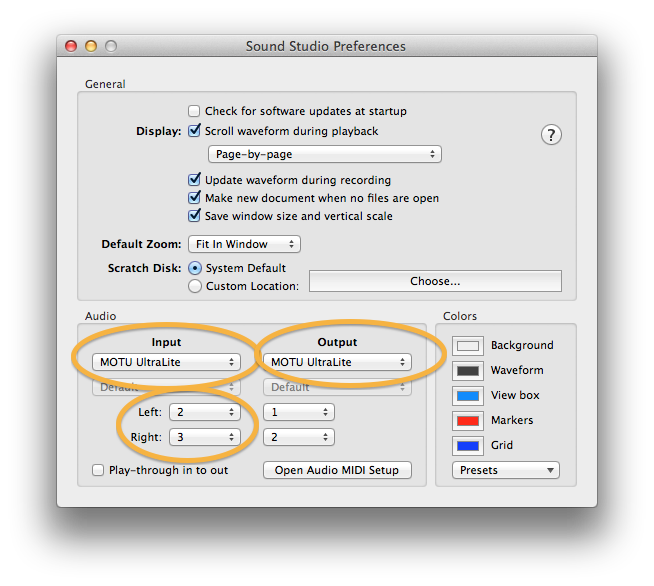
- In the Audio section, select MOTU Ultralight for both "Input" and "Output"
- On the Input side, set "Left" to "2" and "Right" to "3"
- Close the preferences window

Shared Folder
- If a group of experimenters are running the same experiment, you will need to make use of the Shared folder on both iMacs
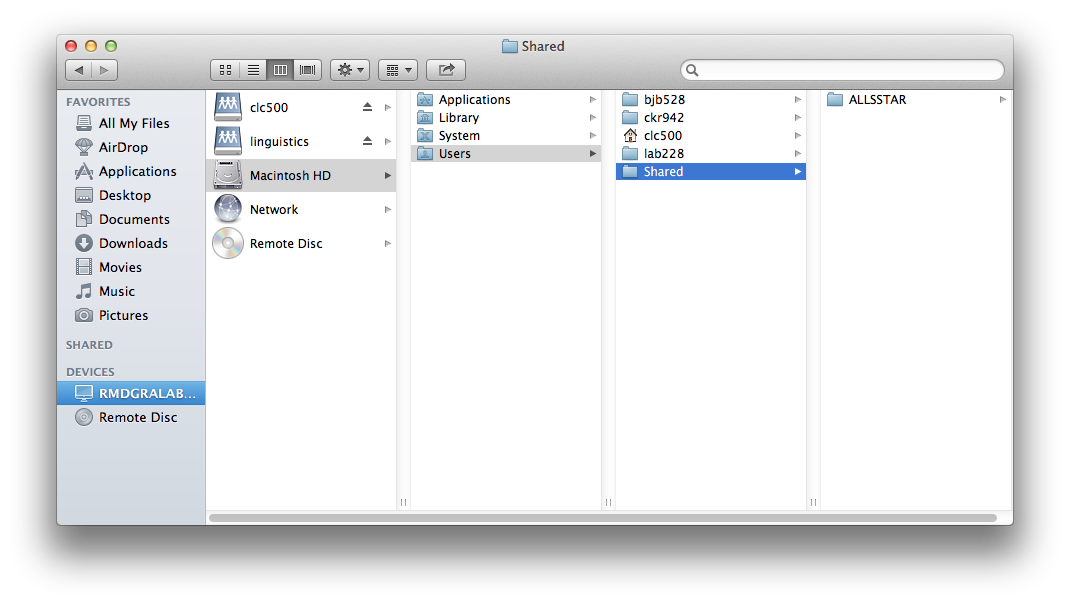
- To access the shared folder, click anywhere on the Desktop, then select "Go" -> "Computer" from the menubar
- Then select "Macintosh HD" -> "Users" -> "Shared"

Recording Audio
- Follow steps 1-3 of the Initial Setup
- Turn on the Flat Screen monitor in the booth.
- Turn on both Yamaha monitor speakers.
- Setup your experiment on Bumblebee. Bumblebee's monitor is mirrored inside the booth. Your subject will be able to interact with the experiment inside the booth using the mouse, keyboard or button box.
- Launch "Sound Studio" on Sideswipe.
- Have the subject sit in the booth with the microphone placed as close as possible to the mouth and slightly below the lower lip.
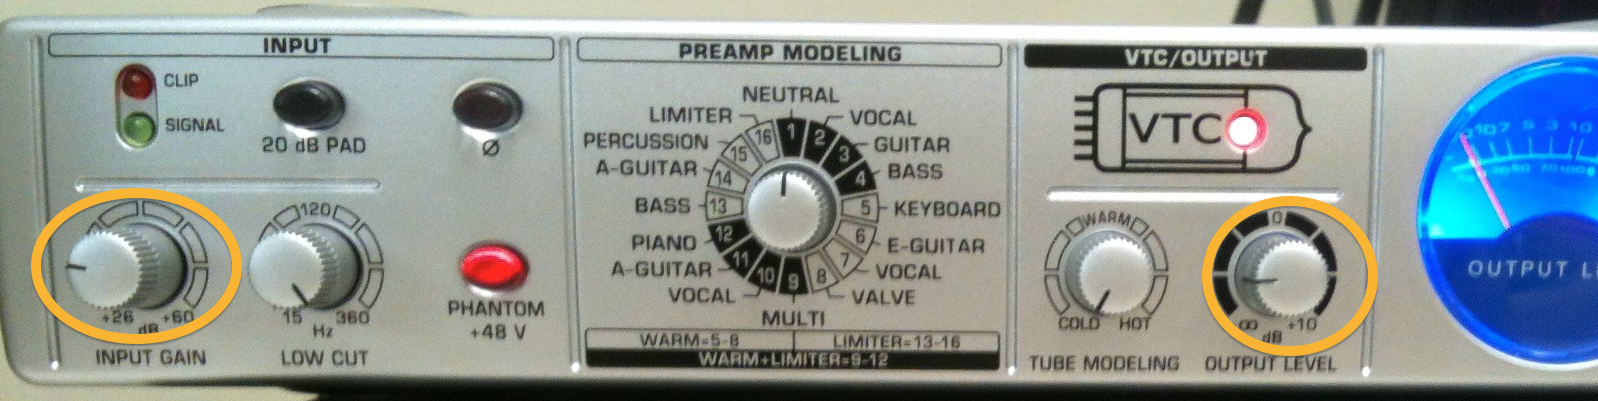
- Have the subject vocalize at normal volume while you adjust the volume level using the "Input Gain" knob on the Behringer amp. You want to obtain the loudest possible signal without clipping (within the green and yellow zones but not in the red).
-
If more volume is required, adjust the "Output Gain" knob on the Behringer amp/>
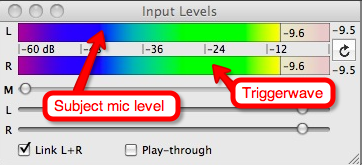
- The left channel input level corresponds to the subject's voice through the mic in the booth. The right channel corresponds to the TriggerWave signal used to mark/segment recordings
- Close the booth door and click the record icon in Sound Studio to begin recording.
- You should be able to hear the subject through the Yamaha monitor speakers.
- Keep track of the incoming volume level, making sure that the levels are not clipping.
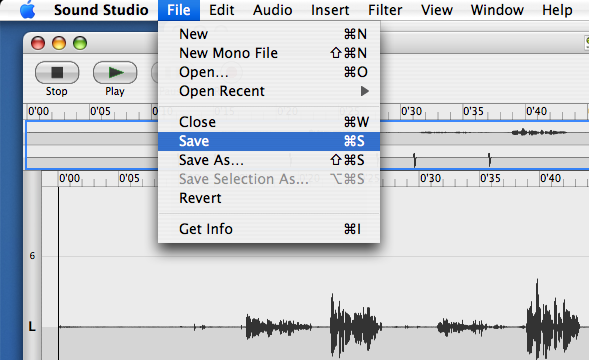
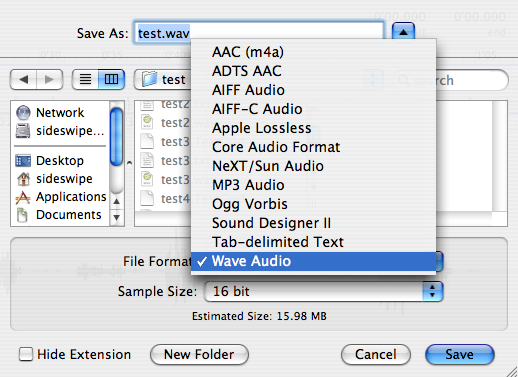
- After the recording is complete, select File->Save in "Sound Studio" and save your audio file. Select the "wave" file format and a 16 bit sample size.

Calibration Notes
HINT software calibrated Jan 2011
- HP4 coupled with Sony MDRV700 headphones
- Left Channel = 8.7mV when noise or speech in HINT is set to 65dB
- Right Channel = 9.0mV when noise or speech in HINT is set to 65dB
When measuring inserts using Radio Shack SLM, readings should be 3-4dB lower. For example, if HINT is generating 65dB, the Radio Shack SLM should read 61-62dB