Cresap 105
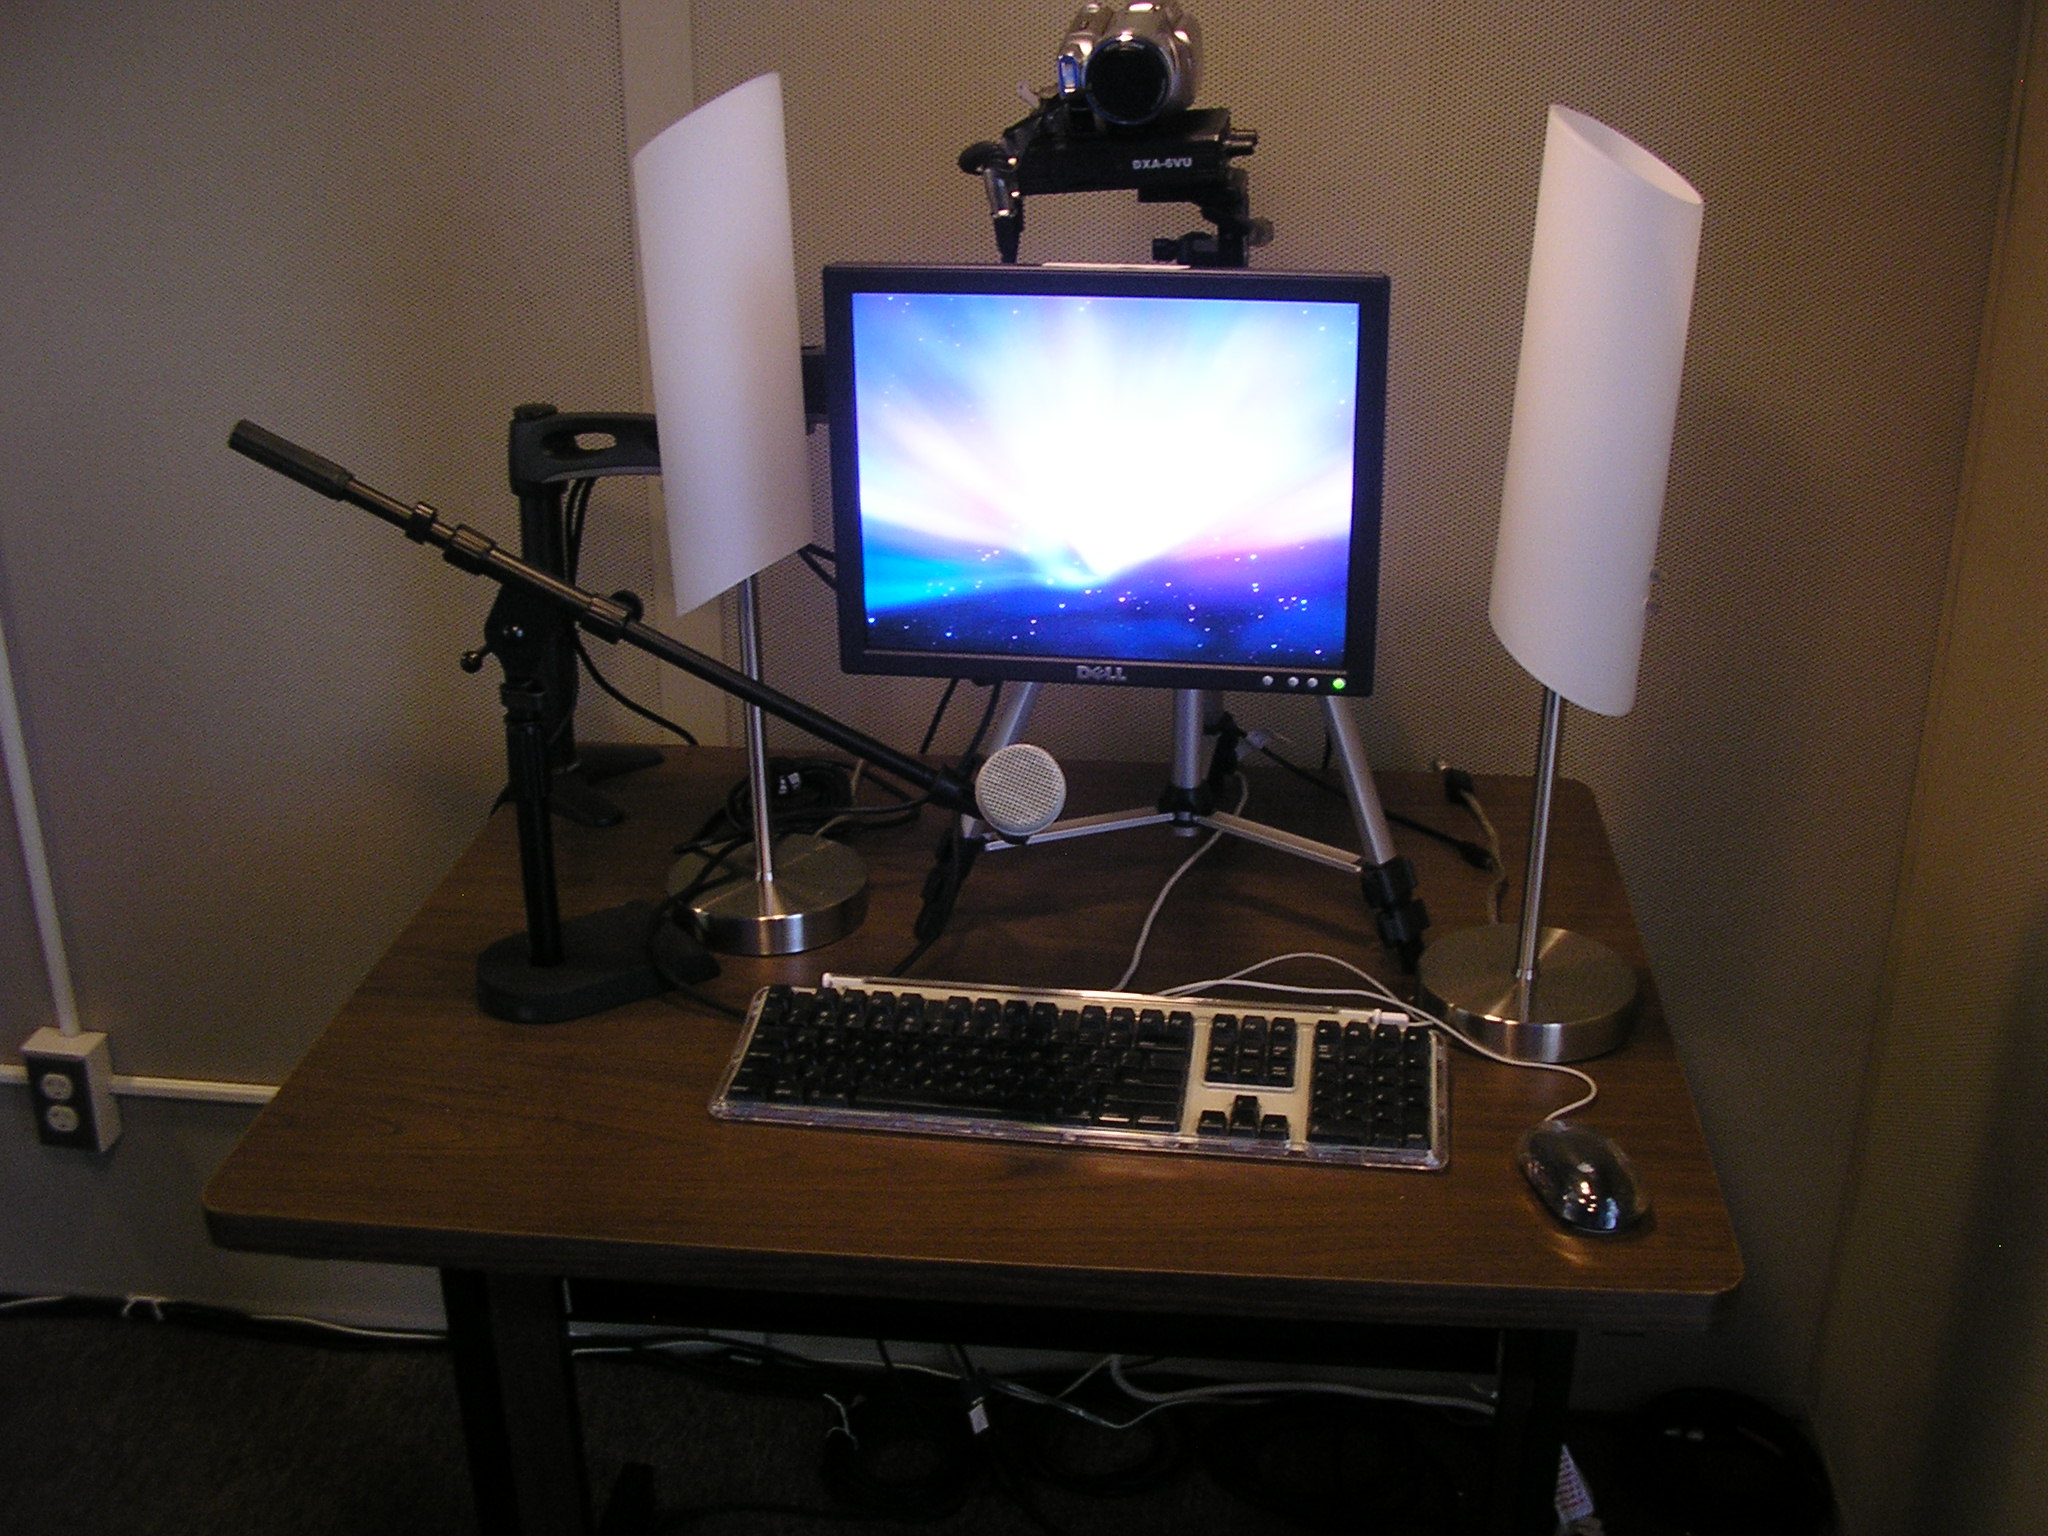
Cresap 105 contains a large sound booth that can hold up to two subjects at any one time. Audio is recorded direct to disk using a multichanel analog to digital audio interface. Each subject can be miked and recorded on individual channels. A multi monitor setup allows for individual video feeds to each subject.
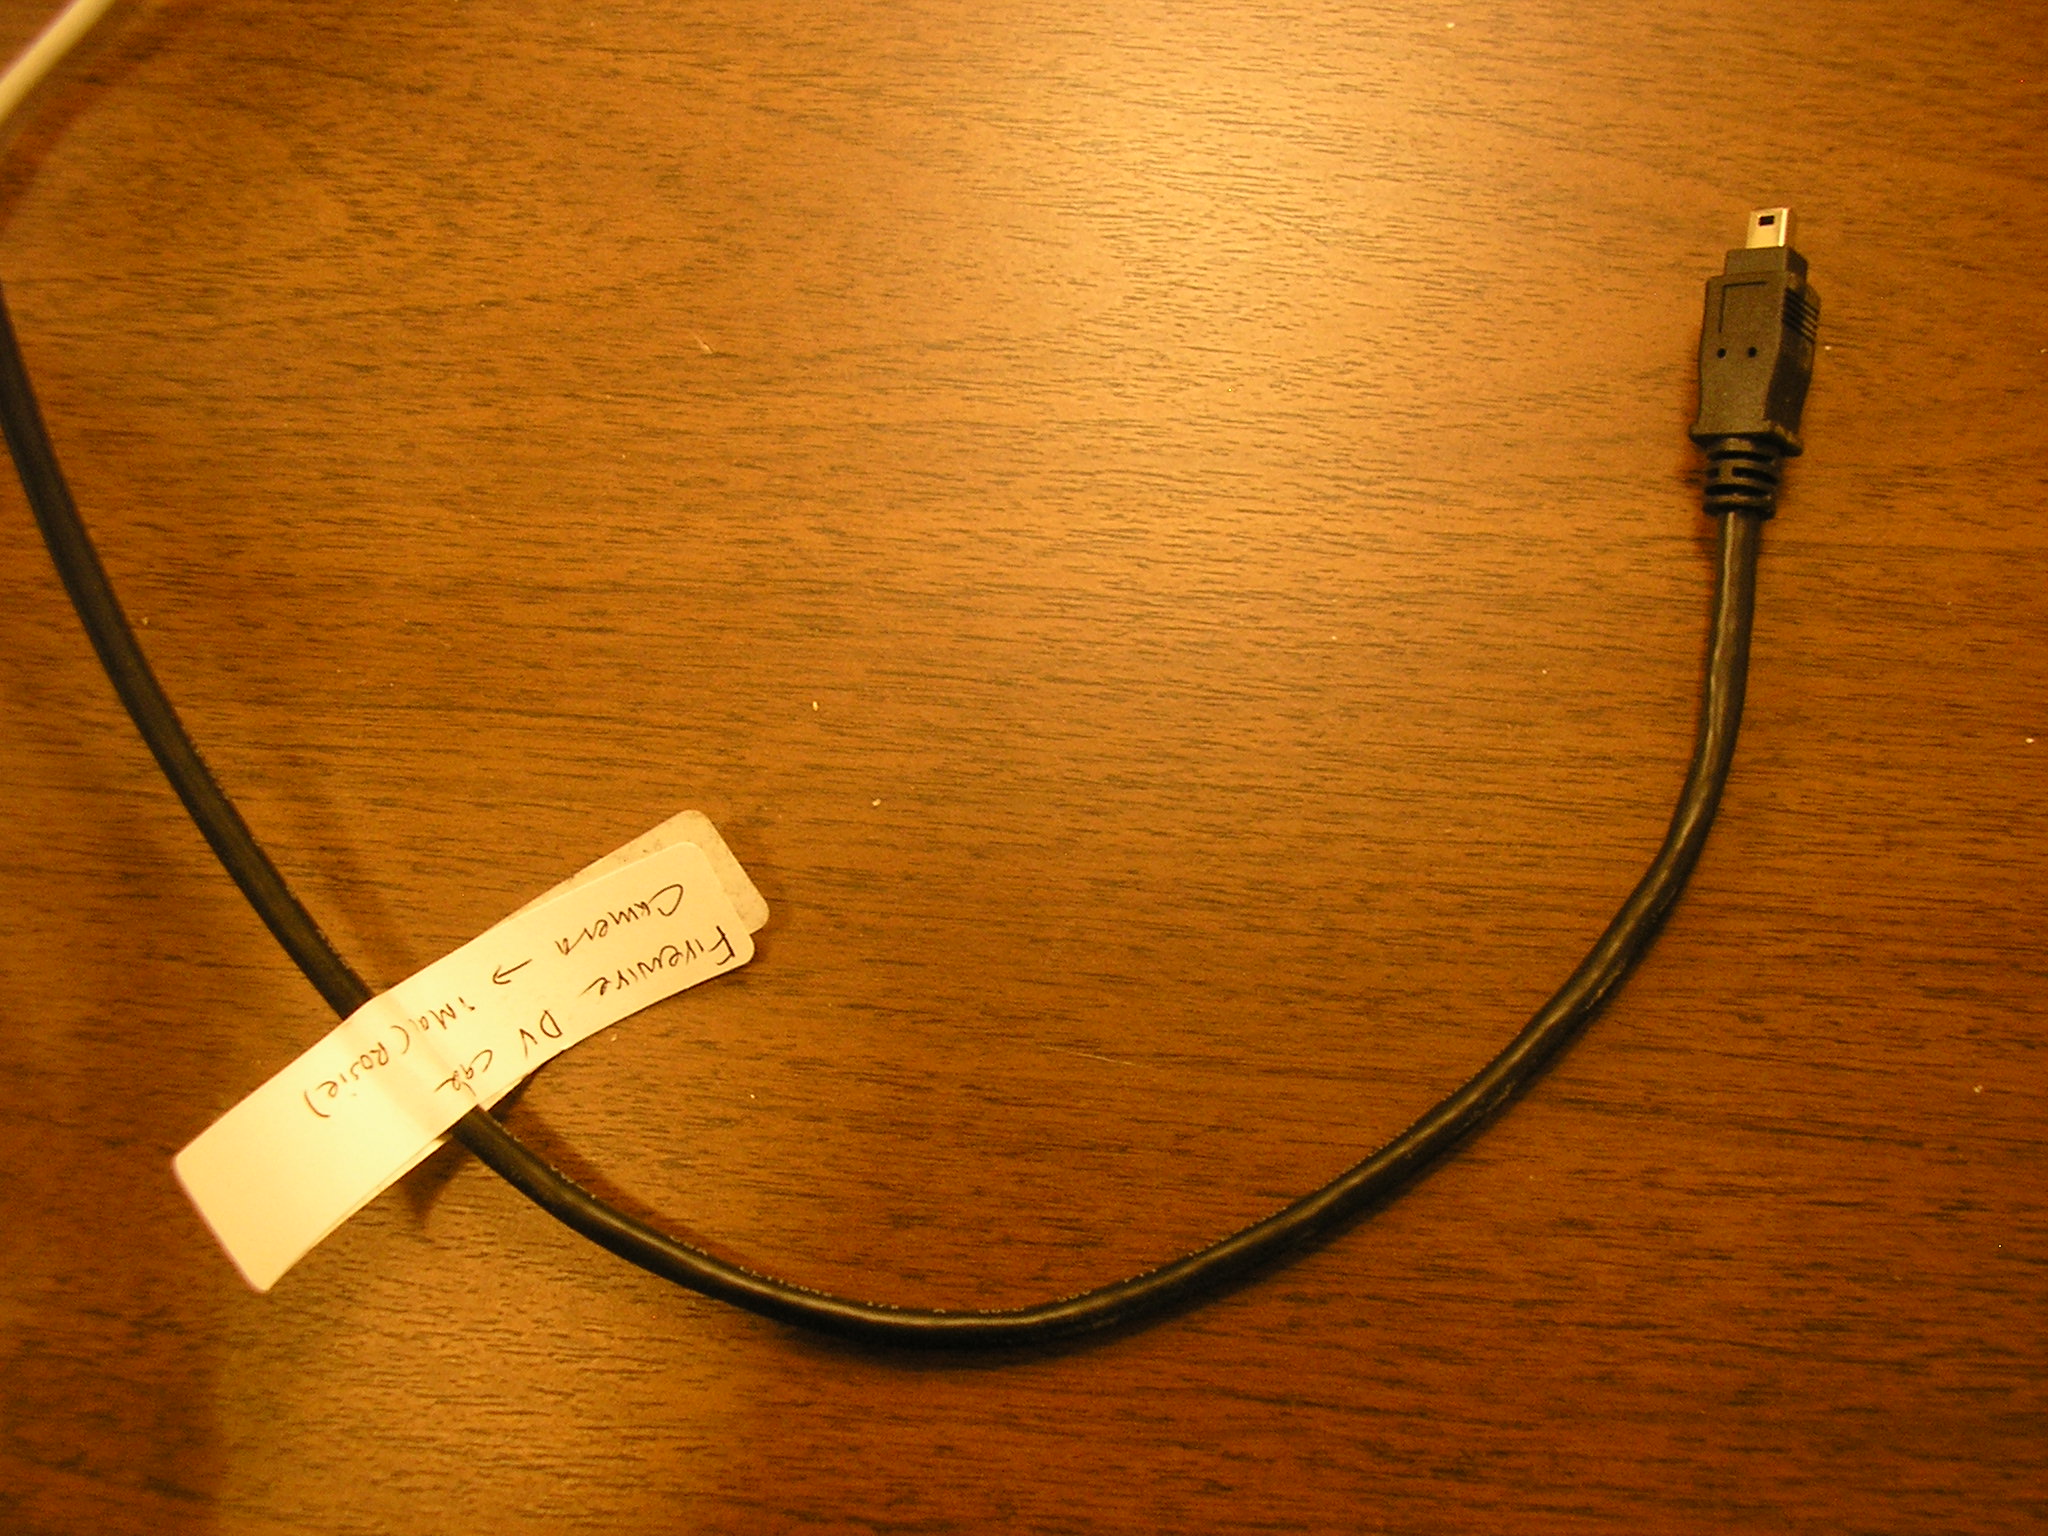
Cresap 105 is also set up for simultaneous audio and video recording. To maintain synchronization, both the audio and video are recorded to digital tape and then transferred to disk via firewire.
Equipment List
- Apple Mac Pro 2.66GHz Quad Core Intel Xeon with 6GB DDR3 SDRAM (Cylon)
- Apple iMac 2GHz Intel Core 2 Duo with 2GB DDR2 SDRAM (Rosie)
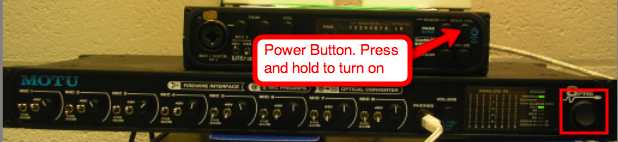
- MOTU Ultralight
- MOTU 8pre
- AKG C420 Headmounted Mics
- Shure SM81 Handheld Mic
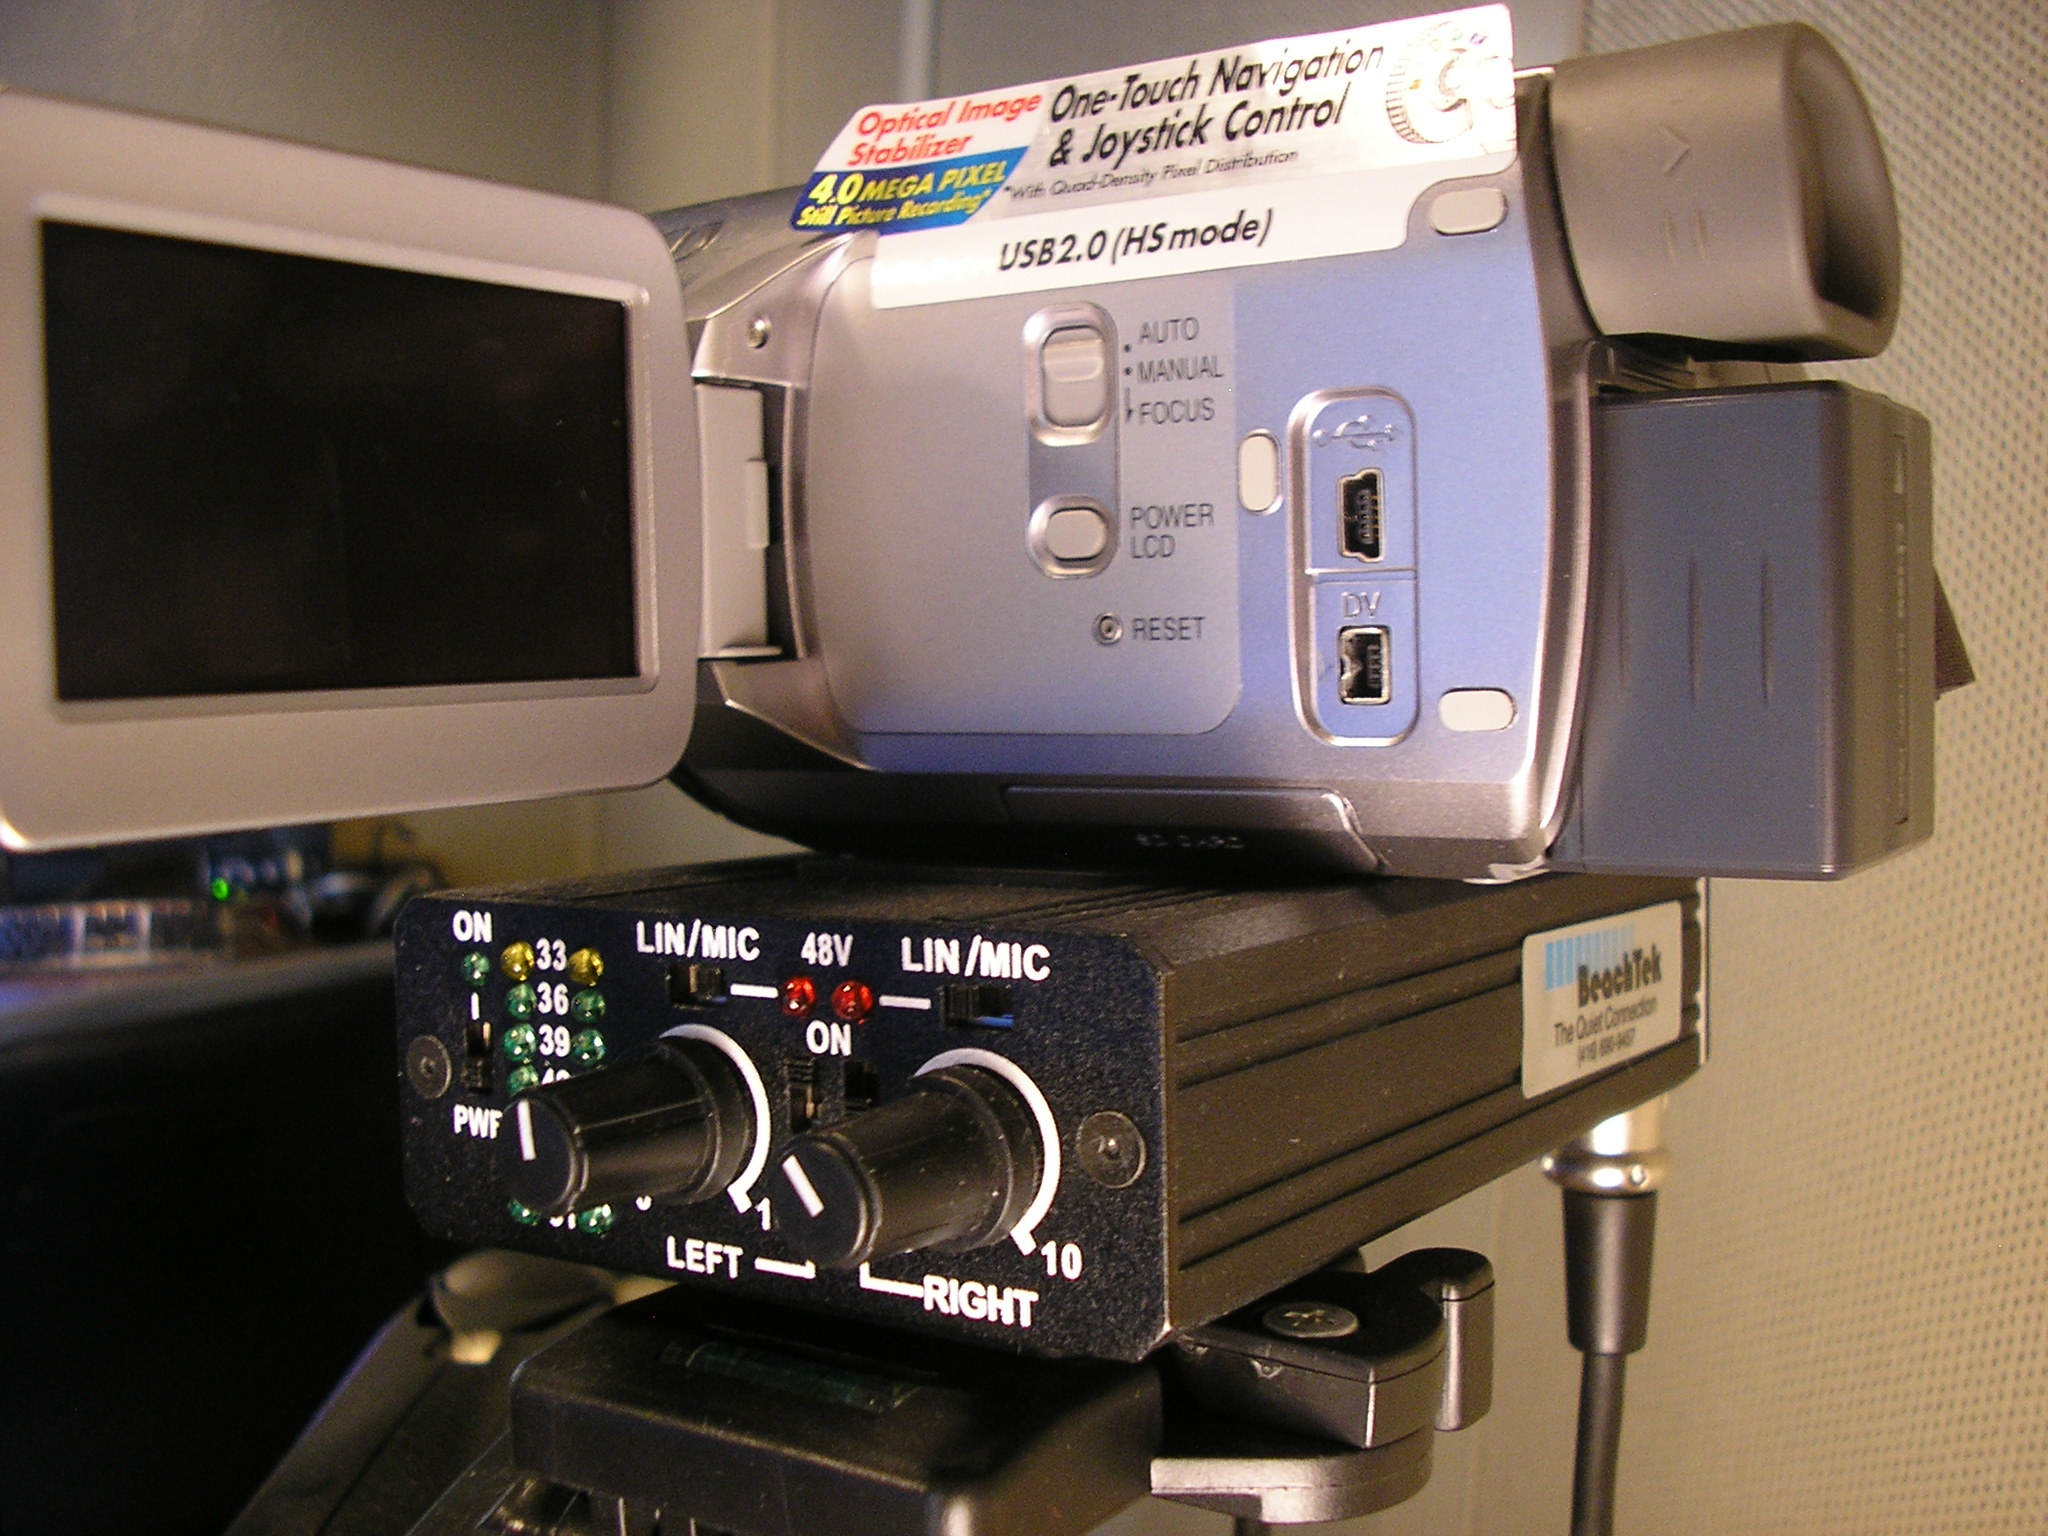
- Panasonic PV-GS500 Handheld Camcorder
- DXA-6VU Adapter
Recording Audio
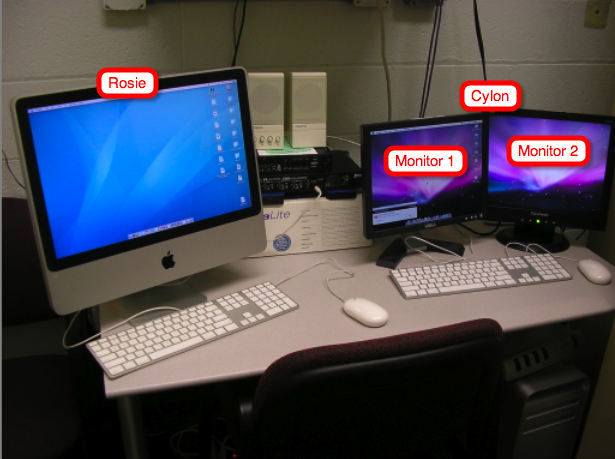
- The Mac Pro in Cresap 105 (Cylon) is connected to two flat screen monitors outside the booth which are in turn, mirrored on two flat screen monitors inside the booth.
-
Monitor 1 outside the booth is mirrored with the Station 1 monitor inside the booth. Monitor 2 outside the booth is mirrored with the monitor in Station 2 inside the booth.
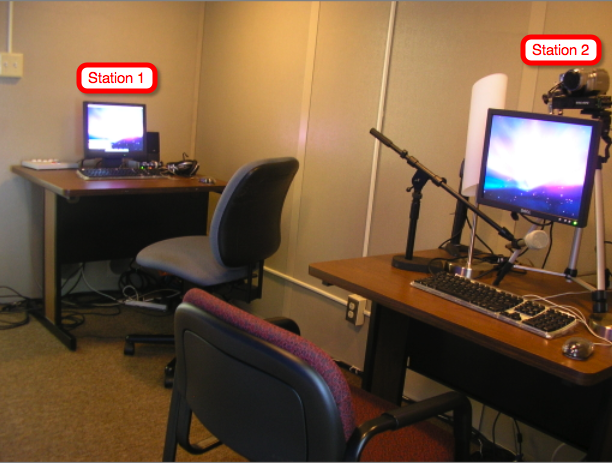
- When recording audio only, use Station 1.
- Set up your experiment running program (Superlab, Max/MSP etc.) on Cylon. The subject will be able to interact with the experiment using the keyboard, mouse or button box and flat screen monitor at Station 1.
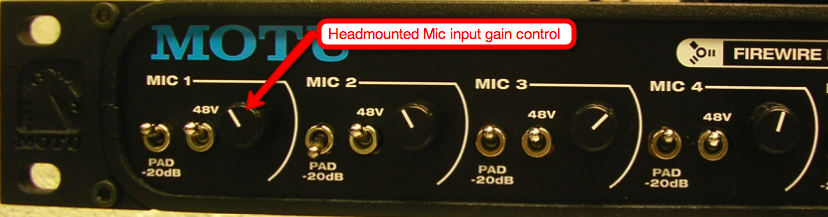
- Place the AKG C420 headmounted mic on the subject and position the mic so that it is close to the mouth and just below the lower lip
- Launch "Sound Studio" on Rosie
- If you are using TriggerWave , Select "New" and then "New File" from the menubar. By default, Sound Studio opens a blank stereo audio file.
- If you are not using TriggerWave, Select "New" and then "New Mono File" from the menubar.
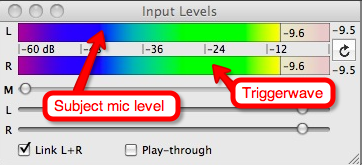
- Have the subject vocalize and make sure that the left channel level meter in Sound Studio is within the green/orange range. Avoid recording at levels that are too low (blue range) or too high (red). The right channel level meter corresponds to the level of the audio markers if you are using TriggerWave.
- Use the MOTU 8Pre gain control knob to increase or decrease the mic volume. You may also need to adjust the position of the mic, bringing it either closer to further away from the subject
- Click record.
- When you are done recording, click "stop".
-
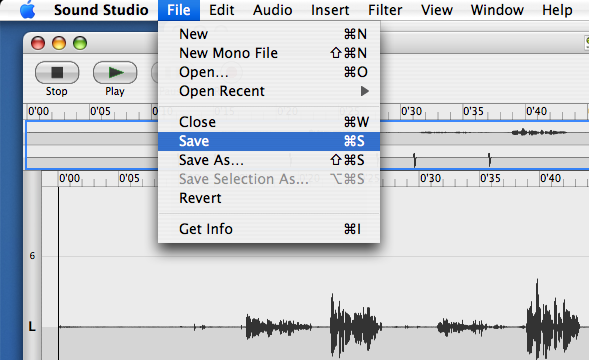
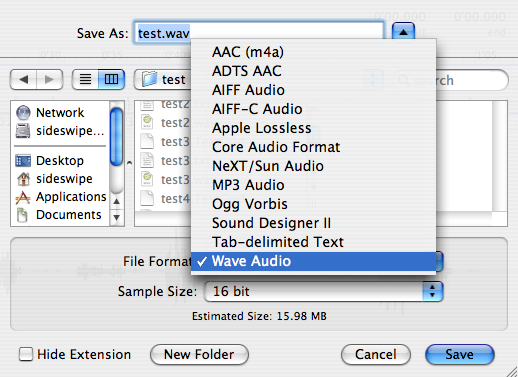
Select File->Save from the menubar and save your audio file. Use the "wave" file format and a 16 bit sample size.

Recording Audio and Video
- When recording audio and video, use Station 2.
- Set up your experiment running program on Cylon. Drag the appropriate windows to Monitor 2 which will display on Station 2 inside the booth. Your subject will be able to interact with the experiment using the keyboard and/or mouse at Station 2.
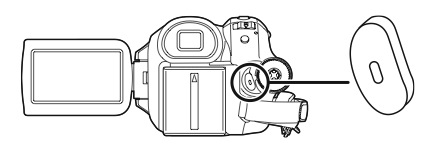
- Remove the lens cap from the front of the camera
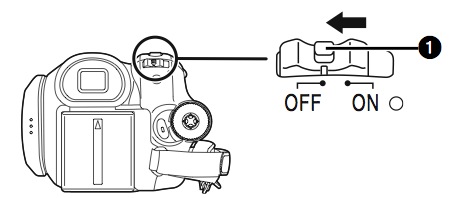
- Turn on the camera
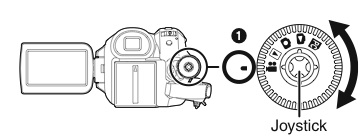
- Set the mode dial to the "film camera" icon. This will put the camera into record mode. The camera is powered by a recahrgeble battery. A second battery pack can be found at the base of the Station 2 table.
- Flip out the camera LCD viewfinder.
- Use the joystick navigation control to rewind the tape all the way to the beginning
- Have your subject sit in front of the flat screen monitor at Station 2.
- Using the LCD viewfinder, position the camera so that the subject's face is in full view of the camera. You may need to adjust the height and angle of the camera accordingly.
- Place the Shure SM81 microphone as close as possible to the subject without obstructing the camera view.
-
Turn on the DXA-6VU adapter. THe DXA adapter is powered by a single 9V battery. Rechargeble 9V batteries are located at the base of the Station 2 table. Replace the batteriy if necessary.

- Have the subject vocalize while watching the mic level meter on the LCD viewfinder. Control the mic input volume by adjusting left gain control knob on the DXA adapter. Make sure the input levels are in the upper range but not beyond the maximum indicated level.
- The right gain knob on the DXA adapter controls the level of the audio marker if you are using the TriggerWave setup.
- When you are ready to begin the experiment, push the record button on the camera
- Push the record button again to end the recording
- Use the joystick navigation control to rewind the tape
- Set the mode dial to "playback" mode.
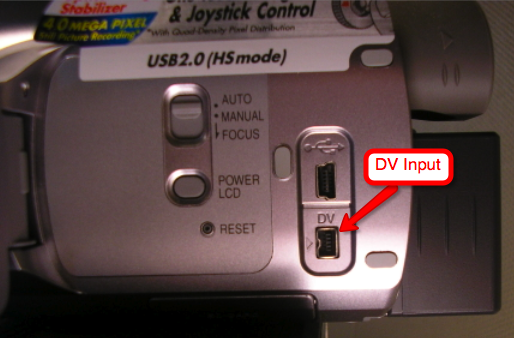
- Connect the firewire cable to the DV input
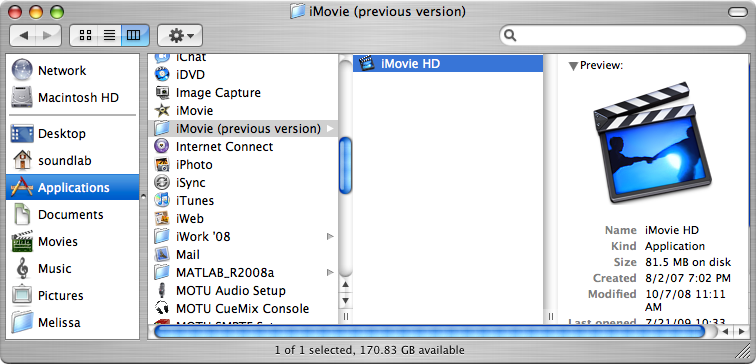
- Launch iMovie HD on Rosie (Applications->iMovie (Previous Version)->iMovie HD
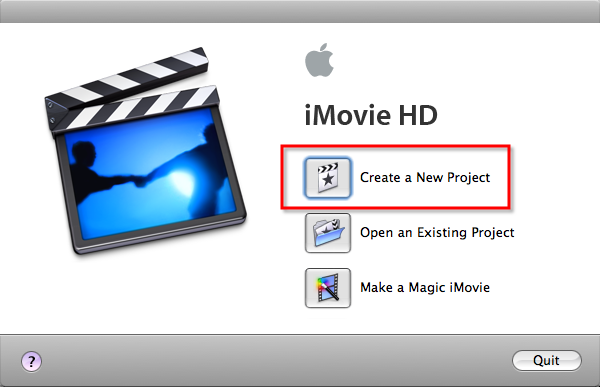
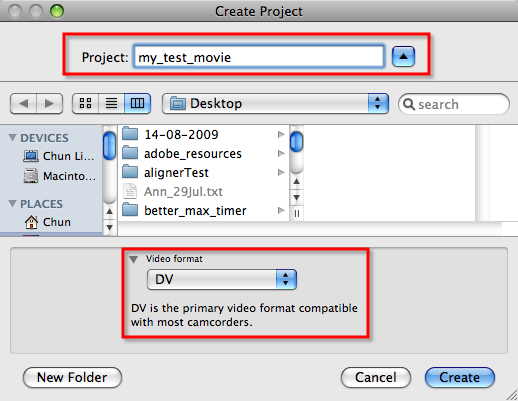
- Click "Create New Project"
- Name your project and select "DV" as the video format
- Set iMovie to "capture" mode using the toggle in the bottom left hand corner
- Click the "Import" button. This will begin importing the video from the camera in real time
- Click stop to end importing.
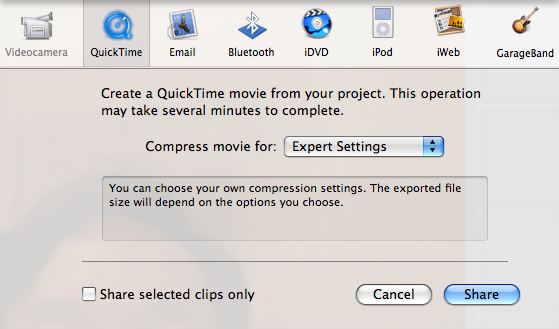
- Select File->Export from the menubar.
- Select "Expert Settings"
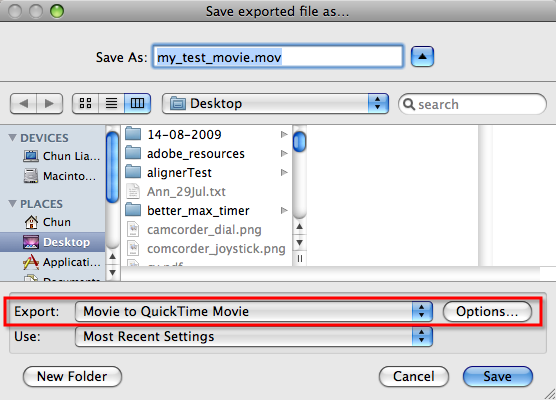
- Select "Movie to QuickTime Movie. Click the "Options..." button.
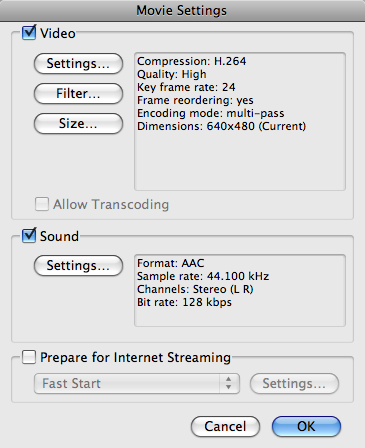
- Set your audio and video parameters to match this screenshot.
- Click "OK" and then "Save"
- Turn off the camera and DXA adapter. Replace the lens cap on the camera.


Troubleshooting Checklist
-
High pitched ringing (usually coming from either one of the battery backup units)
- This is usually caused by power outages. The battery units kick in when the power goes out and the built alarm goes off.
- Simply power cycle the battery backups to turn off the alarm. First, make sure the computers are shut down. There should be a power button on both battery backup units. Hold the button down to turn off the unit and then push the button again to start it back up.
-
Audio output is not playing through the headphones
- Make sure both MOTU interfaces are turned on
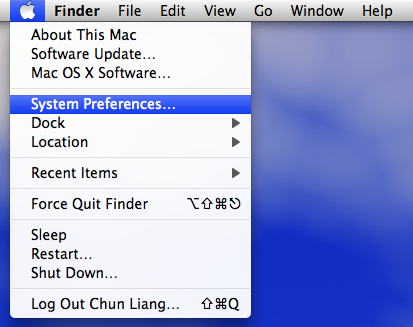
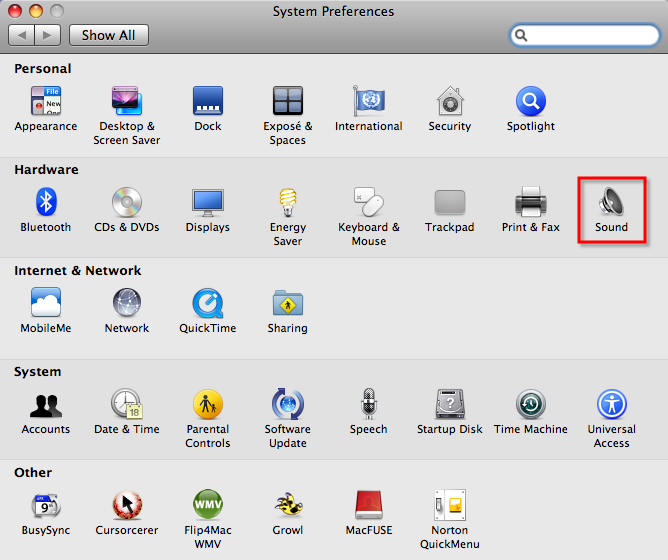
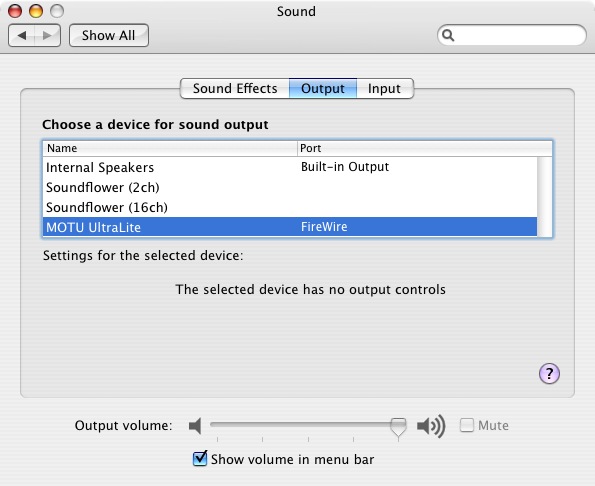
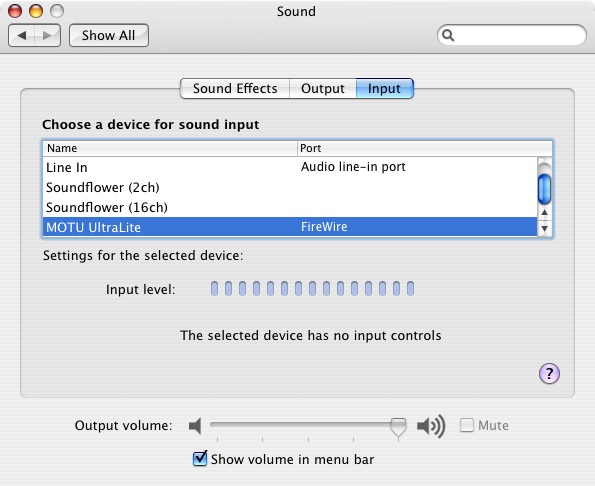
- Make sure that the MOTU audio device is the selected input and output device in the System Preferences Panel on Cylon and Rosie.
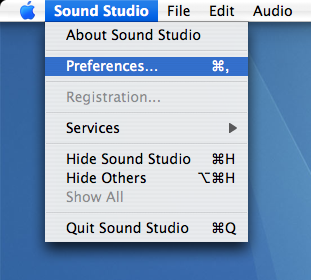
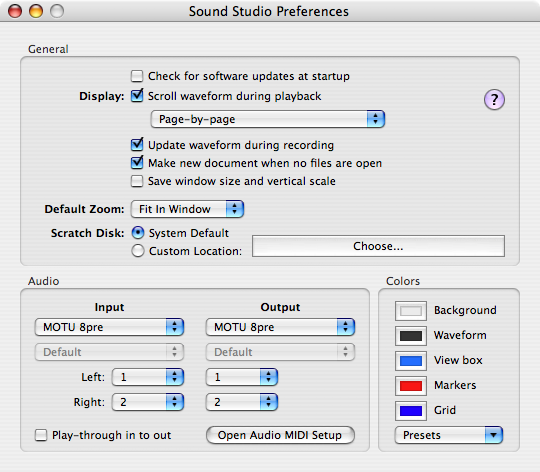
- Open the Sound Studio Preferences panel (Sound Studio->Preferences)
- Make sure both Input and output devices are set to MOTU 8pre.
- Make sure both left and right channels are set to 1 and 2
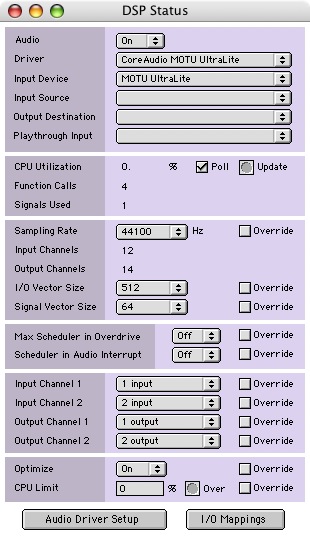
- If using Max/MSP, make sure that the MOTU is set as the output audio device.
- Restart the computer.
- Send an email to c-ch ... @northwestern.edu if you are still unable to resolve any hardware or software related problems.
-
Connection failed error message
- Undergraduate students accessing either Rosie or Cylon may see this error messsage upon login.
- This is a known issue that we are aware of. For now, simply Click the "OK" button to dismiss the error message.

Calibration Notes
HINT software calibrated Jan 2011
- Supercal HINT. Left = 4.53. Right = 4.2.
- HP4 Coupled with Sony MDRV700 headphones
- Leftmost output of HP4 = 7.1mV when noise in HINT is set to 65dB
- Leftmost output of HP4 = 7.1mV when speech in HINT is set to 65dB
NNCS Experiment calibrated Jan 2011
- Using cal_test.maxpat with output set to 65
- Left output of Aphex coupled with ER-1 blue = 22.3mV
- Right output of Aphex coupled with ER-1 red = 23.3mV
General Notes
- When measuring inserts using Radio Shack SLM, readings should be 3-4dB lower